Have you ever wanted to learn the secrets of capturing breathtaking landscapes in your photos? Are you looking for an easy-to-understand guide that can help you take incredible landscape shots?
This ultimate guide to landscape photography will teach you everything you need to know. Whether you’re a professional photographer or a beginner, I've tried to include something for everyone.
I walk you through everything from gear to techniques, as well as provide step-by-step instructions on how to get the most out of your camera. You’ll learn how to use natural light, composition, and post-processing techniques to create beautiful images.
On Landscape Photography Gear
As a landscape photographer, your gear can make or break your ability to capture the perfect shot.
Investing in the right equipment and accessories can ensure you get results you want, regardless of your skill level or the shooting conditions. That said, the gear you might need varies on factors such as your budget, experience, and subject matter.
In this section, I discuss the importance of selecting the appropriate camera, lenses, tripods, filters, and other accessories, drawing from my personal experience in the field.

Cameras
The heart of your photography setup, cameras play a vital role in capturing the final image.
When selecting a camera for landscape photography, look for high-resolution, full-frame or crop sensor options, such as DSLRs or mirrorless models, to provide optimal image quality and detail.
Popular options include the Nikon D850, Canon 5D Mark IV, or the Sony A7R IV. Consider factors such as dynamic range, ISO performance, weather sealing, and ergonomics when making your choice.
Lenses
For landscape photography, wide-angle lenses are often preferred, as they allow for a greater field of view and fitting more of the scene into the frame.
Look for prime or zoom lenses with a focal length between 10-24mm on a crop sensor or 16-35mm on a full-frame camera.
Along with wide-angle lenses, there are other landscape photography focal lengths to explore. Having access to a standard zoom lens (24-70mm) or a telephoto lens (70-200mm) provides versatility for a range of compositions.
Popular lens options include Canon EF 16-35mm f/2.8L III USM and Nikon AF-S NIKKOR 14-24mm f/2.8G ED.
Tripods
Stability is crucial in capturing sharp, high-quality landscape images, especially in low-light situations or when using longer exposures.
A sturdy, reliable tripod can help reduce camera shake and provide a stable platform for your gear. Choosing a tripod for landscape photography isn't all that difficult. Consider factors like build quality, maximum and minimum height, weight capacity, and portability when selecting a tripod.
Renowned tripods include Manfrotto MT190CXPRO4 and Gitzo GT3543LS.
Filters
Filters can enhance the overall quality and outcome of your landscape photographs by correcting colors, reducing reflections, or darkening skies.
Essential filters for landscape photography include polarizing filters, neutral density (ND) filters, and graduated neutral density (GND) filters.
Popular filter brands include Lee, Nisi, and Colkin. Always aim for high-quality, glass filters to minimize any impact on image sharpness.
Other Accessories
In addition to the essentials, certain accessories can enhance your landscape photography experience. These accessories include:
- Remote shutter releases: Allow you to trigger the camera without touching it, minimizing camera shake.
- Spare batteries: A must-have for extended shooting or working in cold conditions where battery life tends to decrease.
- Lens cleaner: Always keep your lenses clean to ensure the sharpest, clearest images.
- Backpack: A comfortable, weatherproof backpack can protect your gear and make it easier to transport during long hikes or treks.
Having the right gear will set you up for success when shooting landscapes – but it's not all that matters.
Camera Settings and Techniques
Mstering your camera settings is an essential aspect of achieving stunning landscape images that resonate with your viewers.
In this section, I'll cover the significance of aperture, shutter speed, ISO, and focus, deconstructing their effects on your final images.

Aperture: Finding Depth and Clarity
Aperture, measured in f-stops, determines the amount of light that enters your lens and affects your depth of field.
A general rule to follow in landscape photography is to maintain a large depth of field, meaning that your foreground, middle ground, and background remain sharp and in focus. To achieve this, you'll want to use a higher f-stop, typically between f/8 and f/16.
In my early days of my photography, I was shooting a beautiful beach scene with rolling waves in the foreground and towering cliffs in the background. I chose an aperture of f/4 to let in more light, but failed to consider how it would impact the depth of field.
The result?
My cliffs appeared blurry, detracting from the overall impact of the image.
Shutter Speed: Capturing Motion and Stability
Shutter speed plays a crucial role in freezing or emphasizing motion in landscape photography.
Fast shutter speeds (1/250 or faster) freeze motion, while slow shutter speeds (1/15 or slower) create a silky or dreamy effect, commonly used for waterfalls and clouds.
I remember one time I was photographing a rushing river and wanted to capture the water's motion. By using a slower shutter speed of around 1/2 second and keeping the camera stable on a tripod, I managed to get a smooth, fluid look that amplified the river's powerful presence.
ISO: Balancing Image Quality and Sensitivity
ISO relates to the camera sensor's sensitivity to light. In landscape photography, it's generally best to keep your ISO as low as possible, often around 100 or 200, to minimize image noise and retain optimal quality.
However, sometimes you might find yourself shooting in low-light conditions or without a tripod, in which case you'll need to increase your ISO to achieve proper exposure.
During a golden hour shoot, I was caught off-guard by a sudden drop in light intensity. With my tripod already packed away, I had no choice but to increase my ISO to 800.
Although a higher ISO was necessary for that situation, it introduced some noise in the darker areas of my image.
Focus: Ensuring Tack-Sharp Landscapes
Getting focus right is paramount to successful landscape photography.
Use manual focus or select a focus point that is about one-third into your scene to ensure sharp images from the foreground to the background.
While more advanced, you may want to use a technique called "focus stacking" for scenes with elements extremely close to your lens or for minimizing diffraction from small apertures.
Mistakes to Avoid and Tips for Better Control
- Always use a tripod for slow shutter speeds to avoid blurred images.
- Don't use an extremely small aperture (e.g., f/22) to maximize depth of field, as it may introduce diffraction, hurting image sharpness.
- Take your time when adjusting your settings – rushing often leads to mistakes.
- Practice shooting in manual mode to gain a better understanding and control over your settings.
Mastering your camera settings takes time and dedication. As you keep experimenting and learning from your experiences, you'll develop a keen sense of when to use specific settings and how they impact your landscape images.
Composing the Perfect Shot
By understanding and applying certain principles of composition, you can create visually engaging shots that stand the test of time.
In this section, I'll walk you through some key composition techniques and concepts you can experiment with and provide tips for finding unique perspectives, capturing wide-angle shots, and focusing on details.

Rule of Thirds
The rule of thirds is perhaps the most well-known composition technique in photography.
It involves dividing the frame into nine equal parts by using two equally-spaced horizontal lines and two equally-spaced vertical lines. The idea is to place the main subject or elements of interest at the intersections of these lines or along them for a more balanced and eye-catching composition.
In landscape photography, this often means placing the horizon on one of the horizontal lines, instead of simply centering it. By doing so, you can emphasize either the sky or the land, depending on which section you give more space.
Similarly, you can place a tree, mountain, or other prominent subject along a vertical line for dynamic impact.
Leading Lines
Leading lines are lines within an image that catch the viewer's eye and lead it toward a point of interest or through the image.
These lines can be natural, like rivers, roads, and mountain ranges, or man-made, like fences and railway tracks. They provide a sense of depth and direction, as well as cohesiveness to the composition.
When capturing a landscape, look for leading lines and try to incorporate them into your shot.
Position them in a way that they guide the viewer's eyes towards a focal point in the scene, or create a flow that takes the viewer on a visual journey through the image.
Symmetry and Balance
Another aspect of composing a perfect landscape shot is achieving symmetry and balance in the image.
Symmetrical compositions can be achieved by mirroring subjects, like reflections on a lake, or by shooting a scene that is naturally symmetrical, such as a row of trees flanking both sides of a path.
Balance, on the other hand, doesn't necessarily involve symmetry.
In landscape photography, you can create balance by counteracting the weight of different elements in the frame. For example, you can balance a big, heavy rock formation on one side with a smaller rock formation and a tree on the other.
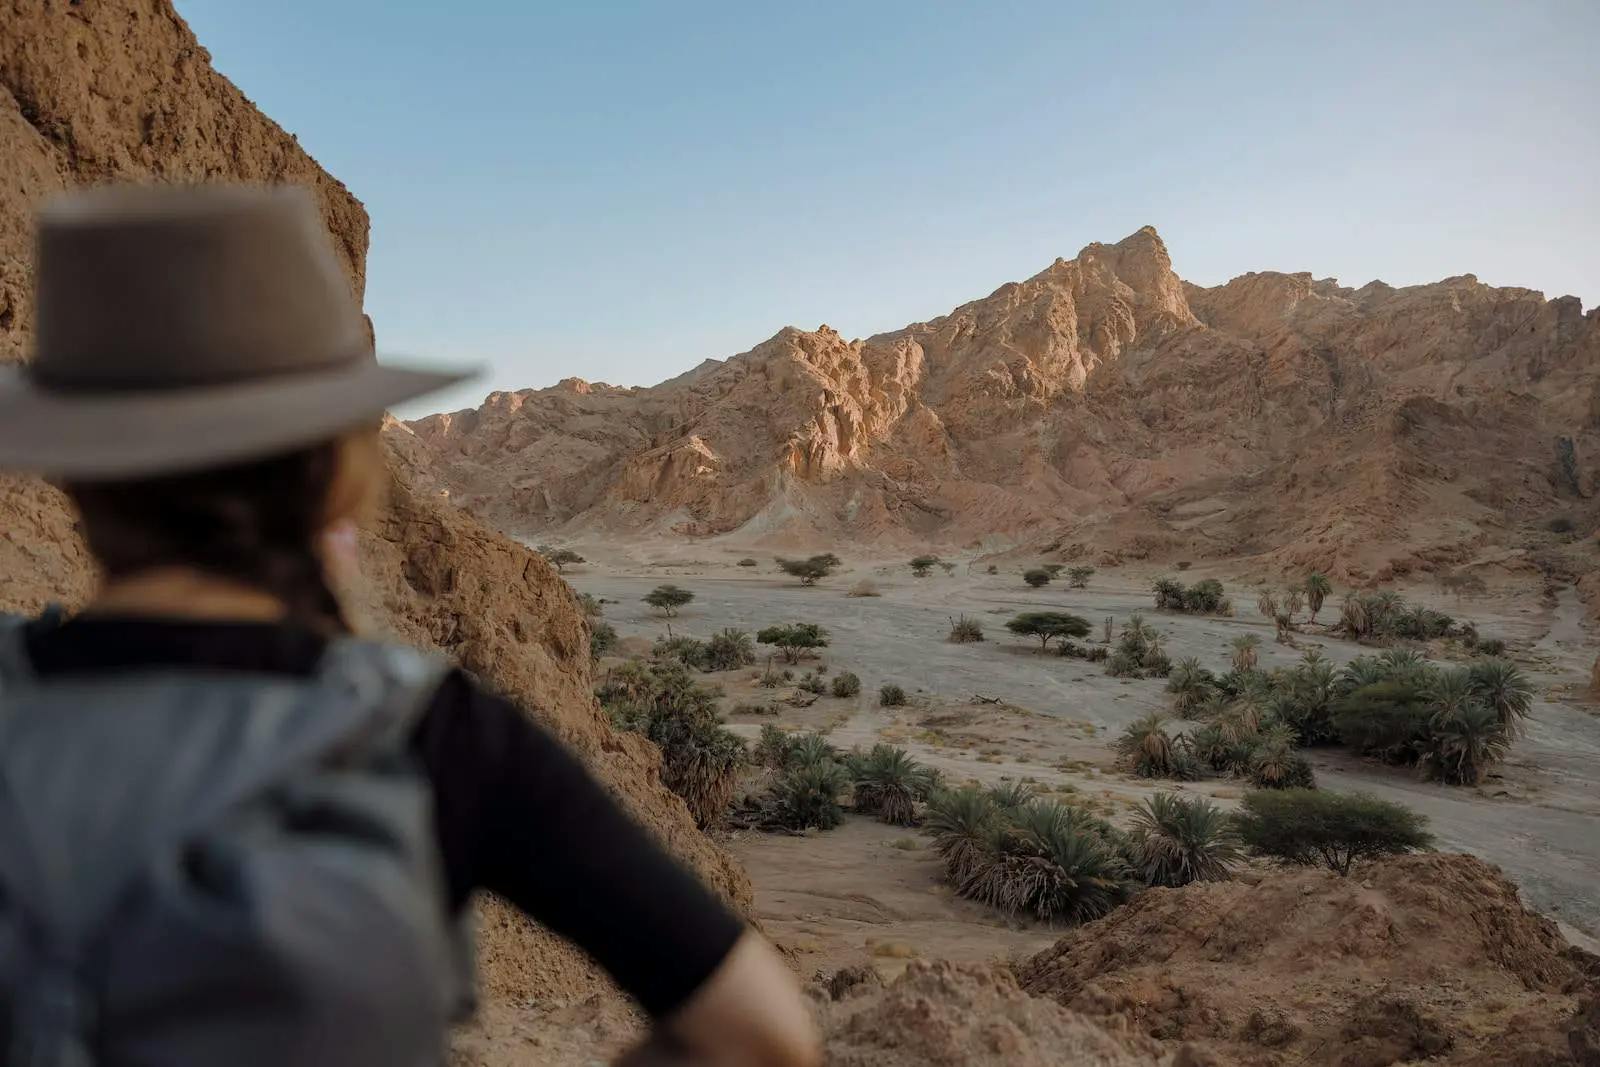
Finding Unique Perspectives
One way to set your landscape photos apart from others is by seeking out unique perspectives.
This can be done by physically changing your vantage point, such as by getting low to the ground, climbing a hill, or shooting from an elevated platform.
You can also achieve unique perspectives by using different focal lengths, such as a wide-angle lens for a dramatic, immersive feel, or a telephoto lens for isolating distant details.
Wide-Angle vs. Detail Shots
Landscape photography often involves capturing both wide-angle shots that showcase vast, sweeping scenes, and detail shots that focus on smaller, compelling elements of the landscape.
When composing wide-angle shots, ensure that you include an interesting foreground, middle-ground, and background. This adds a sense of depth, dimension, and visual interest to the image.
For detail shots, use selective focus and bokeh to isolate your subject and make it stand out from the background.
Composing the perfect landscape shot is all about understanding and applying various principles of composition, exploring unique perspectives, and achieving a balance of wide-angle and detail shots. As you practice and experiment with these techniques, you'll quickly start to see improvements in your landscape photography, and discover your own style and preferences within this beautiful genre.
Working with Natural Light
The amount, quality, and direction of light are what set the mood, tone, and atmosphere of your landscape images.
The greatest landscapes are often the result of a tireless pursuit of chasing the perfect light. In this section, I'll break down some of the best times to shoot landscapes, including the golden hour, blue hour, and the importance of understanding weather patterns.
I'll also provide tips for shooting during challenging lighting situations and emphasize the importance of planning and adapting to various lighting conditions.

Embrace the Golden Hour
The golden hour refers to the time just after sunrise and just before sunset when sunlight is soft, warm, and at a lower angle.
It casts gentle and elongated shadows that add depth and dimension to your landscape images. During this time, the sky often takes on stunning shades of orange, pink, and red, creating a magical backdrop for your photographs.
I cannot stress enough how vital it is to plan your shoots around the golden hour.
You might need to wake up early or stay out late to catch it, but trust me, the results will be worth it. There's a reason it's called the golden hour - it transforms ordinary scenes into extraordinary ones, cast in the most beautiful light.
Discover the Blue Hour
Occurring just before sunrise and just after sunset, the blue hour is the time of day when the sky is filled with soft, cool blue hues, and the landscape takes on a mysterious, almost otherworldly quality.
During the blue hour, you have the chance to capture landscapes with a more serene and calming ambiance. You could even play with various light sources such as city lights or twinkling stars to create stunning contrasts with the prevailing blue tones.
Don't pack up your gear the moment the sun dips below the horizon – stay for a while, and embrace the beauty of the blue hour.
Understand Weather Patterns
Learning to read the weather is a crucial skill for any landscape photographer. While blue skies might appear more welcoming, it's often the presence of clouds and other atmospheric elements that make a landscape image truly remarkable.
For instance, stormy weather can create dramatic lighting conditions, while mist and fog lend an ethereal quality to your photographs. And let's not forget the magic of a perfectly timed rainbow after a rain shower.
Plan your shoots and adjust your expectations according to the given weather conditions.
Check the weather forecast and bring the appropriate gear, such as rain covers or warm clothing, to ensure you're prepared for unpredictable conditions.
Challenging Lighting Situations
Although the golden and blue hours are the favored times of day for landscape photography, don't be discouraged by harsh midday sunlight or overcast skies.
Learning to work with challenging lighting situations is part of becoming a seasoned landscape photographer.
During harsh midday sun, try using backlighting to your advantage or look for scenes that create strong shadows and contrasts. Hone your skills in black and white photography to emphasize form and texture.
Overcast days may seem glum but look closer, the diffused light could make for excellent conditions to shoot waterfalls, forests, or any scene that benefits from even lighting.
The Importance of Planning
Working with natural light means making the uncontrollable and unpredictable into a piece of art.
This requires planning, patience, and adaptability. Study sunrise and sunset times, learn the layout of your chosen location, and check the weather forecast to ensure you're in the best possible position to make the most of the available light.
Working with natural light involves understanding the different lighting conditions and knowing when and how to harness them for the best possible results.
By learning to read weather patterns and make use of the golden hour, blue hour, and even challenging lighting situations, you'll expand your skill set and capture captivating landscape photographs time and time again. Remember to plan, adapt, and be prepared for any situation Mother Nature throws your way.
After all, isn't that part of what makes landscape photography so incredibly rewarding?
Post-Processing Techniques
Just as a painter goes through various stages of creation before they reveal their final masterpiece, landscape photography also involves an essential stage that comes after the photo has been taken: post-processing.
Editing your landscape photos can elevate them to an entirely new level and helps you bring out their true potential.
In this section, I'll cover popular image editing software options,essential post-processing techniques, and how to ensure you strike the perfect balance in enhancing your landscape photographs.

Choosing the Right Editing Software
Before we dive into the techniques, it's important to select the right editing software that aligns with your needs and preferences.
Here are some popular options among landscape photographers:
- Adobe Lightroom Classic: A personal favorite, Lightroom offers a robust set of features specifically designed for organizing, processing, and exporting your images. Its non-destructive editing, presets, and intuitive interface make it a go-to option for many.
- Adobe Photoshop: While it leans more towards advanced users, Photoshop offers immense versatility and comprehensive tools for landscape photographers. If you're willing to invest the time in learning, it can be an unmatched tool in your arsenal.
- Capture One: Known for its exceptional RAW processing and color handling, Capture One is another professional-grade option, albeit with a steeper learning curve. However, the results can be well worth the effort.
- Luminar AI: A relatively newer addition to the landscape of editing software, Luminar AI prides itself on its AI-powered tools and intuitive interface. If you're looking for a more automated approach to editing, Luminar.AI might be a great fit.
Once you've chosen your software, it's time to review some popular post-processing techniques.
Remember, our goal is to enhance the natural beauty of the landscape, not overdo it.
Here are some of the most important techniques to master:
Exposure Adjustment
Landscape photography often involves dealing with a wide range of lighting conditions, and exposure adjustment is your first step towards bringing out the details hidden in the shadows or highlights.
Carefully adjust the exposure, contrast, and brightness to find a balance that best represents the scene you photographed.
Color Correction and Grading
The colors in a landscape photograph evoke emotions and set the mood.
Use the color tools in your editing software to correct any color imbalances and adjust the overall color temperature.
You can also experiment with color grading to give your images a unique and consistent look.
Sharpening and Clarity
Sometimes, even when using the best gear and techniques, your images might lack that crispness and detail that you had hoped to capture.
This is where sharpening and clarity adjustments come into play.
Be careful not to overdo it, as excessive sharpening can introduce unwanted noise and artifacts to your images.
Graduated and Radial Filters
Landscape photography often calls for selective adjustments to specific areas of the frame. This is where graduated and radial filters come in handy.
Use them to bring out the details in the sky, or draw attention to a particular landmark or subject by toning down the surrounding areas.
Dodging and Burning
Harking back to the days of film photography, dodging and burning are techniques used to lighten or darken specific areas of an image.
These techniques can help you establish depth, dimension, and balance in your landscape photos.
Before and After Examples
To truly showcase the importance of post-processing techniques, always compare the before and after versions of your edited images.
This not only helps you measure your progress but also serves as a reflection of the heavy detail you have put into enhancing your landscape photographs.
Post-processing is not just about enhancing your images—it's an art in itself.
With continuous practice and experimentation, you'll soon develop the skills to take your landscape photography to new heights.
Developing a Personal Style
Developing a personal style in landscape photography is an ongoing process, consisting of trial and error, continuous learning, and above all, staying true to your creative instincts.
No two photographers have the exact same style, and that's what makes the photography so exciting and diverse.
In this section, let's check out some essential tips and habits that will help you nurture and refine your unique style over time.

Practice, Practice, Practice
It might sound cliché, but there's no denying the importance of practice in any form of art, and landscape photography is no exception.
The more you shoot, the better you'll understand not only your equipment and technique but also your own preferences and vision as a photographer.
Make it a point to allocate regular time to go out and capture the beauty of landscapes around you, regardless of whether you're traveling or staying local.
Experiment with Your Photography
Don't be afraid to step outside your comfort zone and experiment with different techniques, angles, and compositions.
It's through experimentation that you discover your strengths and your unique approach to landscape photography. Every once in a while, venture into less-traveled paths and try capturing scenes that aren't seen in typical landscape images.
These experiences will add depth to your style and make it more distinguishable from others`.
Reflect on Your Work and Set Goals
Regularly review your past work to track your progress and reflect on the shots that resonate most with you.
This introspection will enable you to identify patterns, preferences, and areas of improvement. Based on these insights, set specific goals for yourself that will help you refine your personal style even further.
For example, if you find that you tend to shoot wide-angle landscapes but also love capturing intricate details, set an objective to incorporate more close-up elements in your future work.
Learn from Others
While your style should be uniquely your own, it doesn't mean you can't draw inspiration from photographers you admire.
Look up the works of landscape photography greats and analyze what aspects you find striking about their compositions, lighting, or processing.
Remember, learning from others doesn't imply copying their style; rather, it's about appreciating their art and incorporating some of their techniques or philosophies into your own work.
Engage with Photography Communities
There is an abundance of platforms enabling you to showcase your work, receive feedback, and connect with like-minded individuals.
Join photography communities, both online and offline, to share your photos, exchange ideas, and immerse yourself in the latest trends. Engaging with these communities will help you stay motivated, learn from your peers, and refine your personal style over time.
Be Patient and Persistent
Developing a personal style is a slow and organic process that requires time, persistence, and dedication.
Be patient and don't get discouraged by initial setbacks or slow progress. Focus on continuous improvement and building a solid foundation in technique and creativity, and you'll soon find that your unique style begins to emerge and take shape.
Developing your personal style in landscape photography is a rewarding journey that adds depth and character to your work.
Embrace the uniqueness of your perspective, be open to learning and experimentation, and remain persistent in your pursuit of growth. Your creative voice will find its way to shine, and your landscapes will leave a lasting impression on viewers' hearts and minds.
So keep pushing your boundaries, seek inspiration, and share what you've created with the world.